
Establishing Finger Strength on a Hangboard

October 2026's Training Tidbit is all about finger strength for those unfamiliar with it.
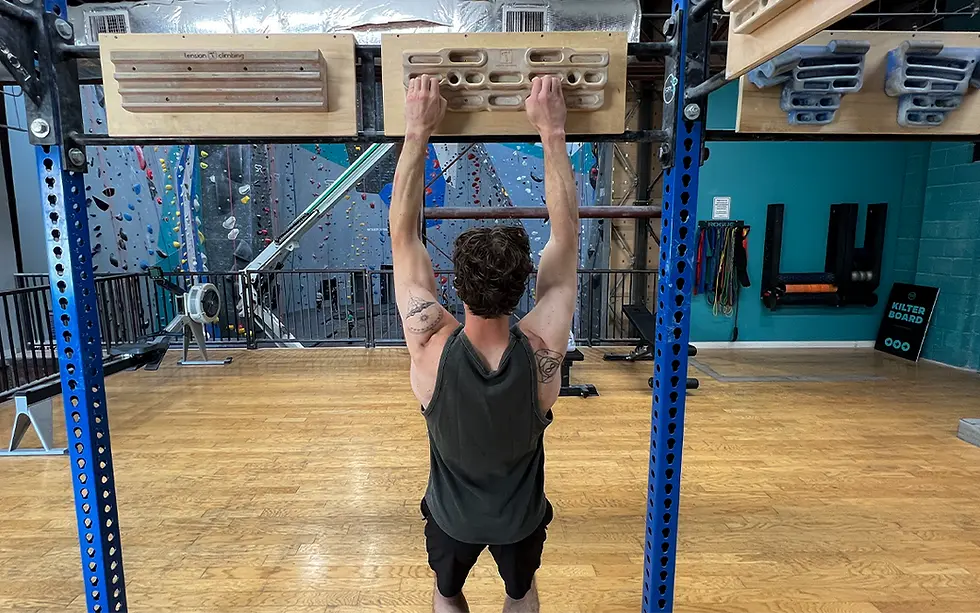
Finger strength is one of the most important physical qualities for climbing, and one of the easiest to train poorly. Too many climbers treat it like a test: hang from the tiniest edge, hold on as long as possible, repeat. But that's not training, it's just surviving. The real goal is to gradually load your fingers so they get stronger and more capable of holding on.
Your Main Finger-Training Tool: The Hangboard
A hangboard is a mounted training board with edges and grips of different sizes. It is the most common tool climbers use to intentionally build finger strength. Its variety of edges scales to any finger strength and grows with you as you get stronger, and it's what we'll use for this exercise.
The Drill: Establishing Finger Strength
Find a hangboard with a variety of edges. Grab a hangboard with a comfortable edge (>20 mm) and choose a grip position you commonly use while climbing. For most climbers, a half crimp is a good place to start. Your first goal isn't to find your maximum, it's to find a load that lets you produce high-quality, controlled effort. If a half-crimp is too strenuous to start, try these exercises with an open hand position. As you become comfortable utilizing this training tool, training a variety of grip positions (open hand, half-crimp, full-crimp, drag, etc.) will become important to give you a well-rounded toolbox.

Step 1: Find Your Starting Point
Hang with both hands in a consistent half-crimp, keeping every hang identical.
Step 2: Find Your Load
Adjust weight or assistance until you can hold that position for 7–10 seconds with good form and real effort.
Step 3: Make It Repeatable
Do several matching hangs with full rest between each, keeping every rep the same.
Rules
Prioritize finger position and control over difficulty
Never train through sharp or unusual finger pain
Stop if your grip position starts breaking down
Rest fully between hard efforts
Start conservatively; finger strength takes time to build
Track your load so you can progress it gradually
It's important to remember...
Finger strength actually comes from your forearms, but the force they generate travels through the tendons in your fingers. Here's the catch: muscles in your forearms get stronger much faster than the tendons in your fingers, hands, and wrists. Early on, you might feel ready for a harder climb well before your tendons can handle the load, and that gap is where many climbers pick up finger tendon injuries that heal slowly.
That's why good finger training isn't about surviving the hardest hang possible. It's about producing high-quality force with enough consistency and recovery for your tendons to catch up, so you build strength that holds up instead of breaking down.

